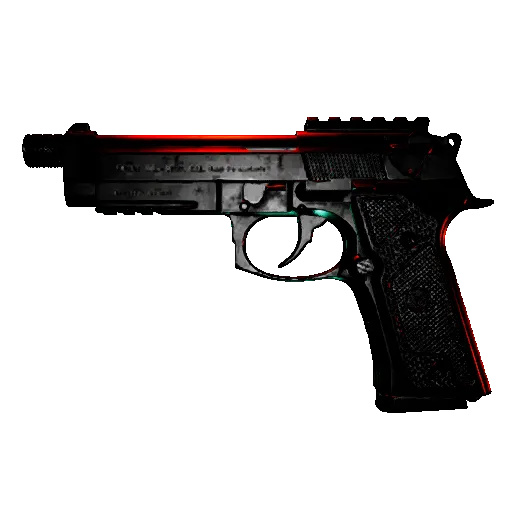
Start with the combat lane
Weapon combat uses three related calculations. A firearm begins with the value for the hit zone, then changes that value with its distance curve. A shotgun uses the same firearm rule for each projectile and adds only the pellets that registered. A melee swing starts with the selected attack and hit zone, then applies the multiplier for the first, second, or third body touched.
Use the lane that matches the event you are checking. Do not turn a firearm’s base damage into a distance result, a shotgun’s full pellet count into guaranteed damage, or a melee swing’s total into equal damage for every target. Those shortcuts combine values that the rules keep separate.
The default check is small: choose one weapon, one hit zone, and the target health you need to clear. Add distance for a firearm, connected pellets for a shotgun, or contact position for melee. This gives you one result you can act on. Change one input only when the situation in front of you changes.
Open the Firearms inventory view for the current base fields and the Melee inventory view for attack and contact values. The query page answers what a weapon has. This guide explains how those values combine.
Open the Zombies query and select the threat you saw when you need its exact health, attack damage, or contact range. Keep that one profile’s fields with the weapon result you are checking.
Use the zombie threat mechanism when you need to turn one selected incoming attack into a health budget. It keeps health damage, stability, Grab, armor, and difficulty labels in their separate rules.
Calculate firearm damage by distance
Each current firearm has torso, head, and limb damage plus a distance curve. The curve returns a multiplier for the selected distance. The direct health result is:
damage at distance = hit-zone damage × distance multiplier
The curve is continuous. It can hold full damage through an opening span, then change between stored points. A rounded label is useful for reading the result, but the threshold calculation keeps the full value. If two nearby distances display the same rounded damage, they can still sit on opposite sides of a required-hit boundary.
One current distance curve
The orange line is . It is evaluated between stored curve points, so any distance can be tested.
| Weapon | Hit zone | Target health | First extra hit | Change |
|---|---|---|---|---|
| Torso | 100 | 30.2 m | 5 to 6 | |
| Head | 100 | 30.2 m | 1 to 2 |
The first-extra-hit column solves a 100-health example. It marks the first distance where the rounded-up hit count increases for that weapon and zone. It is not a universal range recommendation. A different remaining-health value, hit zone, or weapon produces another boundary.
Equality clears the health budget. If two exact hits total 100 damage, two hits are enough. The third hit becomes necessary only after the per-hit result falls below 50. The same rule applies to other fractions of the selected health.
required hits = ceiling(target health ÷ damage)
Worked example: torso hits
| Distance | Damage per hit | Hits for 100 health |
|---|---|---|
| 10 m | 20 | 5 |
| 35 m | 18.5 | 6 |
Use remaining health when deciding whether the next registered hit finishes a wounded target. Use full health when checking a fresh target. If the next threshold is close, moving nearer preserves the hit count but costs space. Holding farther away protects space but may require another hit. Open the Inventory record for another weapon only when the current one cannot solve the lane.
Count the shotgun pellets that register
A shotgun does not use one indivisible shell-damage number. The firearm rule produces damage for one projectile at the selected distance and hit zone. The connected-projectile rule then multiplies that value by the pellets that registered on the same zone.
connected damage = damage per pellet × connected pellets
Divide the target’s current health by one pellet’s damage and round upward to get the required connected count. If that count is greater than the weapon’s projectile count per shot, one shell cannot clear the selected health budget under those inputs.
| Shotgun | 0 m | 10 m | 20 m | 30 m |
|---|---|---|---|---|
| 6 | 6 | 7 | 8 |
The table follows one 590A1 record against a 100-health torso target across four distances. It does not claim that every pellet lands. A miss, a pellet on another hit zone, or an impact on an obstruction is outside the connected count for the chosen zone. Open another shotgun’s Inventory record when that is the weapon in your hands.
A registered-pellet example
at 10 m deals 17 torso damage for each registered pellet.
17 × 5 = 85
5 connected pellets leave a 100-health target at 15 health. The threshold is 6 connected pellets.
The same torso threshold increases to 7 pellets at 15.1 m.
For a mixed pattern, the safe default is to calculate each hit zone separately. Treating head, torso, and limb pellets as though they all received the best multiplier overstates the result. If you cannot tell where the pattern registered, use the lower connected count you can support, or plan another shell.
| Shotgun | Capacity | Pellets | Stability / pellet | Penetrations | Damage retained | Stability retained | Pellet spread | Maximum spread |
|---|---|---|---|---|---|---|---|---|
| 8 | 10 | 10 | 1 | 80% | 5% | 2.15° | 25° |
Capacity is the number of shells held before a reload. Pellets is the number of projectiles generated for one shot. Penetration retention changes a projectile after a valid penetration. Stability per pellet is a control value, not extra health damage. Keeping these fields separate prevents a large profile number from becoming a promise about a future shot.
Apply melee contacts in order
A melee arc can touch as many as three ordered targets. The first body uses the first-contact multiplier, the second uses the second, and the third uses the third. With one or two contacts, the unused later multipliers do nothing.
Quick, strong, and charged attacks have separate torso, head, limb, stability, base-stamina, and per-contact values. The rule selects the attack first, then applies the contact sequence:
contact damage = selected attack damage × contact multiplier
swing stamina = base attack stamina + (stamina per contact × bodies touched)
One quick torso swing, three contacts
| Weapon | First target | Second target | Third target | Total damage |
|---|---|---|---|---|
| 15 | 10.5 | 7.5 | 33 |
Values follow the bodies touched by the swing, from the first contact to the third.
stamina for a swing = base stamina + (stamina per contact × contacts)
Quick swing stamina by connected contacts
| Weapon | Base | Per contact | 1 contact | 2 contacts | 3 contacts |
|---|---|---|---|---|---|
| 5 | 5 | 10 | 15 | 20 |
The base cost is paid once. Each body touched adds the per-contact cost once.
Damage and stability are separate outcomes
| Weapon | Contact | Damage | Stability damage |
|---|---|---|---|
| Target 1 | 15 | 5 | |
| Target 2 | 10.5 | 2.5 | |
| Target 3 | 7.5 | 0 |
The three damage cells are not interchangeable. If the first multiplier gives the strongest result, the body that enters the arc first receives it. Put the urgent blocker first when positioning allows it. The cost is angle and movement: changing the arc to favor one target may give up a safer line to another. A narrow one-target swing is the alternative when extra contacts add stamina without protecting the route.
The contact count uses bodies actually touched, not the number you intended to hit. A broad swing that reaches one body uses the one-contact stamina result. A swing that clips a second or third body adds the matching contact cost even when those later health results are small.
Keep health, stability, and stamina separate
Health damage answers whether the selected health budget reaches zero. Stability damage describes a separate control outcome. Stamina is paid by the player for the attack and its contacts. Adding these numbers together creates a total that the combat rule never applies.
Use the stamina mechanism to place that exact swing cost inside a fixed running sequence and keep the current 20-point reserve.
For firearms and shotguns, check registered health damage against current target health. Read stability as a second result only when that field exists. For melee, read the health and stability values at the same ordered contact position, then read stamina once for the complete swing.
This separation also explains why a lower health result can still matter in a crowded lane. It may deliver a useful stability result, but that does not lower the number of health-damage hits required unless the health-damage value also changes. The page reports both without converting one into the other.
Make the next combat choice
For a firearm, start with the next required-hit threshold at the distance you expect. Stay inside it when doing so does not break squad position or pull you into another threat. Hold farther back when space matters more than one extra hit. Change weapons when another current profile keeps the needed threshold without the same position cost.
For a shotgun, count the pellets that registered on one zone. Fire another shell when the calculated remaining health stays above zero. Close distance when the required connected count leaves too little margin for misses. Use the Ammunition inventory view before keeping a firearm that you cannot support with a compatible family.
For melee, put the priority body first in the contact order and check the full swing’s stamina before committing to a crowd arc. Use fewer contacts when later targets do not protect your exit. The alternative is to preserve stamina for movement and take a cleaner single-target opening.
These defaults come from the calculation, not from an assumed play style. Team position, current health, and available ammunition still decide which cost is acceptable in the run.
Know what this rule does not answer
The firearm lane covers direct hit-zone damage, continuous falloff, and health-based thresholds. The shotgun lane adds projectile count, connected pellets, stability, and penetration retention. The melee lane covers quick, strong, and charged values, ordered contacts, stability, and contact-based stamina.
The rule does not predict aim, pellet placement, hit registration, armor resolution, moving collision order, animation interruption, target behavior, or latency. A range or spread field cannot prove how many hits will register. Use the rule after choosing defensible inputs, then keep encounter uncertainty outside the number. Open the weapon attachment mechanism for exact mount, spread, recoil, range, and suppressor fields.
Difficulty scaling is separate. The examples here use base weapon values, so they are not a final difficulty-adjusted health result. Use the Inventory query for current weapon fields and relationships, then use this calculation for the selected attack.
These values and examples are current for Hotfix 1.0.4.0. The page was checked on September 2, 2026.