Read the live Survival state
Start with the text and marker on screen. “Prepare Location for Wave 1,” “Prepare Location for Wave 2,” and “Prepare Location for Wave 3” are setup phases. Each matching protect prompt begins a 300-second speaker defense. The map can choose Zone A, B, or C for any numbered wave, so a remembered letter order is not a route.
Read six things before moving: the selected map, current wave, active zone, latest speaker warning, living team position, and the field item the team is actually missing. Check the extraction state only after those immediate facts. This keeps one damaged speaker from becoming a debate about an unopened package or another map’s trap layout.
The short rule is to solve the nearest live failure. During preparation, regroup and ready a control that belongs to the selected zone. During protection, stay on the speaker. A 25% or 50% warning closes optional work; the 75% warning makes direct defense the next action.
Use the first matching action
Read these cards from the top and stop at the first exact match. They are separate situations, not a sequence or a score. A later card must not override a success result, failure result, 75% warning, or reachable downed teammate.
Use the first matching Survival state
The operation has succeeded
Follow the live Extraction marker.
- Match
- The game shows “Operation has Succeeded” after Wave 3. Speaker condition, spare resources, and earlier failures no longer reopen a defense wave.
- Why
- The current Survival flow moves from the third completed defense to Extraction.
- Cost or alternative
- Stop repairing or searching the cleared zone. Regroup and use the extraction route now shown by the game.
The operation has failed
Stay for the result, then change the next run.
- Match
- The game shows “Operation has Failed.” The run reaches that branch after 2 failed defenses.
- Why
- The failure result ends this defense attempt. A spare item or a repaired control cannot restart a finished operation.
- Cost or alternative
- On the next run, reach the active zone earlier, keep the squad together, and reserve recovery for the speaker defense.
Protect phase, 75% speaker warning
Return to the active speaker and defend it now.
- Match
- A protection prompt is active, the 75% damage warning has played, and the operation has not yet ended. Team position, resources, and an available exit do not make optional searching the next action.
- Why
- Seventy-five percent is the last speaker warning before the result boundary.
- Cost or alternative
- Leave map-wide support and unopened supplies for later. Clear the route that is already reaching the speaker.
Protect phase, a reachable teammate is downed
Cover one ordinary revive beside the active defense.
- Match
- The speaker has not reached its 75% warning, a living teammate can reach the downed player, and the revive route remains inside the active defense. No success or failure result is showing.
- Why
- The team needs the Responder back without abandoning the speaker. The revive remains a separate interaction with its own time and health budgets.
- Cost or alternative
- If nobody can reach the player without leaving the defense, the downed player uses a held Revive Syringe; otherwise the living team holds the speaker.
Protect phase, 25% or 50% speaker warning
Use one relevant local defense, then return to the speaker.
- Match
- A 25% or 50% warning has played, every teammate is alive, and the active zone still has a usable shutter, trap, winch, or restore-power interaction. No 75% warning or end result is active.
- Why
- The warning identifies speaker damage. The selected map record identifies which control families actually belong to this zone.
- Cost or alternative
- If the local interaction is unavailable or would pull the team away, skip it and defend the speaker directly.
Prepare phase, local defense is not ready
Ready one control listed for the active zone.
- Match
- A prepare prompt is active, the squad is at the selected zone, and one listed local shutter, trap, winch, or restore-power interaction is usable. Immediate recovery is already covered.
- Why
- Zone-local controls are tied to the selected defense area. Map-wide support slots are a separate set and do not prove a physical route.
- Cost or alternative
- When no listed interaction is usable, stop searching for an unstated control and set the team around the live speaker marker.
Prepare phase, recovery is missing and the package is present
Collect the current Supply drop, then regroup at the active zone.
- Match
- A prepare prompt is active, the team is together, local defenses are ready, a recovery or ammunition gap remains, and the package triggered for this wave is visibly available.
- Why
- Package 1 is tied to preparation for Wave 1. Packages 2 and 3 are tied to completion of Waves 1 and 2.
- Cost or alternative
- If the package has not appeared, do not wait on an assumed timer. Use current Inventory or return to the active defense.
Prepare phase, the team is split
Regroup at the active zone and transfer only the missing field item.
- Match
- A prepare prompt is active and living teammates are separated. The current package and local controls may be ready or not; team position is the first open failure.
- Why
- Every wave can select Zone A, B, or C. Following the live marker keeps the team on the same selected defense instead of a remembered letter order.
- Cost or alternative
- Keep a working attack and recovery while moving. Drop or share an item only after the receiver is present.
Unfinished wave, no safe recovery path
Take Early Extraction when the point is available.
- Match
- No success or failure result is showing, the speaker has no active 75% warning, the team cannot cover the recovery gap, and the point shows “Early Extraction Available.” The player rejects the remaining Responder risk.
- Why
- An available early exit ends the unfinished run before another defense contact. It does not repair the speaker or restore health.
- Cost or alternative
- No Credits rewarded for Early Extraction. If the point says “Cannot Abandon,” return to the live Survival task instead.
Protect phase, no urgent exception
Hold the active speaker until its prompt changes.
- Match
- A protect prompt is active, every teammate is alive, no 75% warning is active, recovery is covered, and the player accepts the remaining run risk.
- Why
- Each current wave uses a 300-second defense record. The next action changes only when the game shows a warning, a fallen teammate, a result, or the next prepare prompt.
- Cost or alternative
- Do not leave for optional loot. Use one relevant local control only when it keeps the defense route intact.
The early-exit card applies only when the point itself says it is available and the immediate 75% speaker warning is not active. Early Extraction does not count as repairing a failed defense. If the point is unavailable, the only current route is back to the live Survival task.
Prepare for each wave
Every current wave uses the same five-minute defense duration, but it has its own prepare and protect wording. Package timing is not a free-running clock: Package 1 belongs to Wave 1 preparation, Package 2 follows Wave 1 completion, and Package 3 follows Wave 2 completion.
Three current prepare-and-protect records
Prepare Location for Wave 1
Protect Speaker from Wave 1
Package 1 begins with this preparation.Prepare Location for Wave 2
Protect Speaker from Wave 2
Package 2 follows completion of Wave 1.Prepare Location for Wave 3
Protect Speaker from Wave 3
Package 3 follows completion of Wave 2.During preparation, cover the current gap rather than collecting everything. Keep one working attack, matching ammunition when the attack needs it, and recovery for the team. The Inventory query gives the exact item and ammunition relationships. The stamina mechanism gives the 20-point reserve used before a fixed sprint or melee sequence, and the noise mechanism separates sound-stimulus fields from guaranteed zombie behavior.
When the squad is split, regroup first. Transfer a field item only when the receiver is present; an item dropped for a distant teammate is not a recovery path. When the current package is missing, confirm that its wave trigger has happened and that the package is visible before leaving the active zone.
Use the selected map record
All three current Survival maps have three named zones, and all nine zones are eligible for Waves 1, 2, and 3. The control record is local to that zone. The gas-power, light-power, and propane-trap counts are map-wide support records; their slot numbers do not establish coordinates, a shortest route, or which interaction is ready now.
Use the record for the selected map
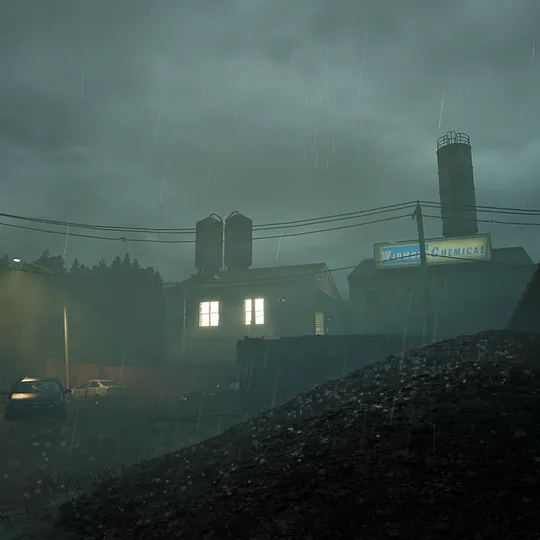
FLOODED
Help the National Guard rescue survivors in Berks County
- Zone A
- Chemical Plant: 3 shutters, restore power
- Zone B
- Train Yard: 3 shutters, 1 winch
- Zone C
- Mechanic: 3 shutters, restore power
- Map-wide support records
- 2 gas-power slots, 4 light-power slots, 2 propane-trap slots

LIGHTHOUSE
Help the National Guard rescue survivors in Cape Elizabeth
- Zone A
- Lighthouse: 4 shutters
- Zone B
- Houses: 4 shutters
- Zone C
- Fort: 4 shutters
- Map-wide support records
- 7 gas-power slots, 6 light-power slots, 4 propane-trap slots

NIGHT OF THE LIVING DEAD
Help the National Guard rescue survivors in Butler County
- Zone A
- Farm House: 2 traps
- Zone B
- Guest House: 1 shutter, 1 trap
- Zone C
- Barn: 1 shutter
- Map-wide support records
- 6 gas-power slots, 3 light-power slots, 3 propane-trap slots
Open the selected record in the Maps query when you need the mode, sessions, zone names, map-wide support, and extraction transport together. Use only that map’s local shutter, trap, winch, or restore-power family. Do not carry a Lighthouse shutter plan into NIGHT OF THE LIVING DEAD or infer a physical route from support-slot numbering.
Recover when the defense breaks
Recover from the state the game shows
The team reaches the zone late
Skip optional searching. Follow the live zone marker, keep one working attack and recovery option, and start with the speaker route.
The expected zone is not selected
Any A, B, or C zone can serve any numbered wave. Follow the live marker and use only the controls listed for that selected map zone.
The next package is missing
Package 2 follows Wave 1 completion and Package 3 follows Wave 2 completion. If the matching trigger has not happened or the package is not visible, return to the active task.
The speaker warning escalates
At 25% or 50%, stop optional work and tighten the defense. At 75%, defend the speaker directly instead of leaving for another control or item.
A player dies during Wave 3
Stay for the live result. The current game does not establish a special final-wave respawn outcome, so the wave number alone promises neither an automatic return nor permanent loss.
The speaker warnings are damage stages, not a countdown. They do not say how many zombies remain, how fast the next hit arrives, or whether one control can prevent the next threshold. Use the warning to narrow the action: cancel optional travel, close the defense around the live speaker, and handle one reachable revive without abandoning that route.
The zombie threat mechanism explains current health, attack, Grab, and distance fields for one profile. The Nightmare difficulty mechanism applies one selected difficulty record without converting its enemy-presence labels into a spawn count. If a player becomes downed or dead, use the survive, revive, or respawn guide and keep the Wave 3 respawn result explicitly unknown.
After the second failed defense triggers “Operation has Failed,” stop planning for another wave in that run. Stay for the live result. That threshold does not establish a special automatic respawn or character-loss result for Survival.
Finish Wave Three and extract
When Wave 3 ends with “Operation has Succeeded,” the next stage is Extraction. Stop repairing cleared controls, regroup, and follow the live marker. A fast-rope helicopter is the current transport entry for each Survival map, but the map record does not supply its physical route or arrival timing.
The Early or Final Extraction guide covers the live exit state, HUD labels, Rescue Beacon boundary, and no-Credits Early Extraction result. Do not assume that Wave 3 success settles Supplies or saves a downed or dead player before the game shows the result.
The task is complete when the operation succeeds and every living player follows the live extraction route. It is not complete at the start of Wave 3, at the first speaker warning, or when a package appears. If the mode or difficulty was the wrong fit, use the mode and difficulty plan before starting another defense.
The game does not state speaker health points, repair amounts, enemy counts, spawn timing, package contents, physical control coordinates, a special Wave 3 respawn result, or extraction arrival timing.
These decisions apply to Hotfix 1.0.4.0. The game facts were checked on September 3, 2026.